
The Fundamentals of Positioning
This resource aims to provide a set of fundamental guidelines when determining positions
Such guidelines should reduce ambiguity and improve intuitiveness, thus increasing progression effectiveness and consistency
Having preset positions will reduce time deciding where to go when seeing a new mechanic as positioning solutions already exist
Positionings should still be evaluated in a fight to fight basis. If a concept doesn’t work, then a separate solve is required
TL;DR:
The inconsistencies between 1 NE vs 1 NW arise naturally from logical deductions
No matter which system you choose, there is at least one “flaw”
Preset positioning diagrams are available for groups to use:
For statics, referring to groups by name (xxx’s group) is preferable to “group 1” and “group 2”
The Underlying Logic of Positioning Systems
The positioning system is comprised of the marker system and pairing (and grouping) system
The marker system should be connected to the pairing system via colour coordination, an important property
The principles of the pairing and grouping systems hold true irrespective of the marker system (e.g. P8S II)
Marker and pairing systems should be consistent when possible
Both major positioning systems are effective
Any system has at least one “inconsistency” or “flaw”. The choice of which system to use should be based on the group's preference
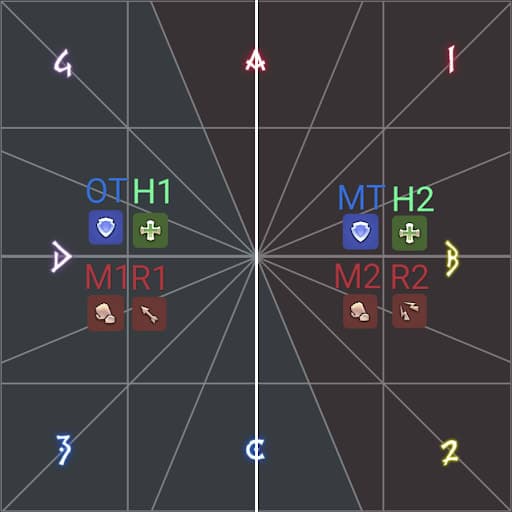
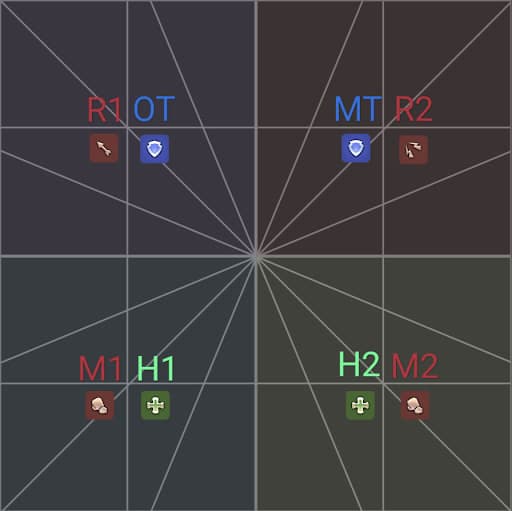
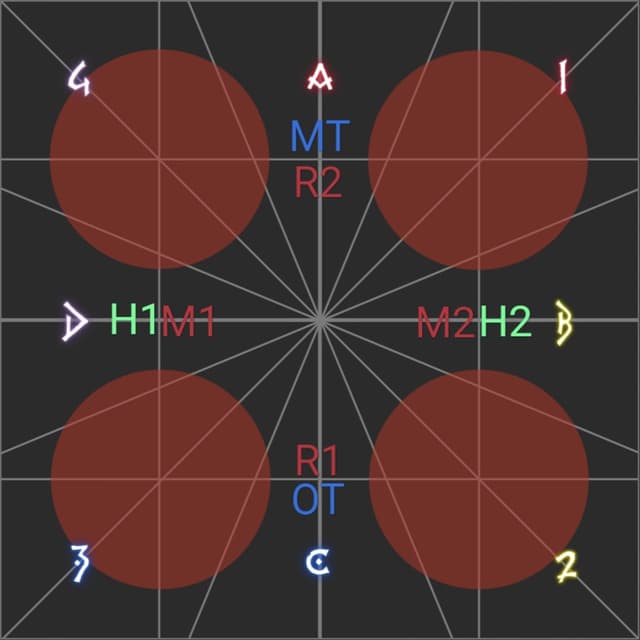
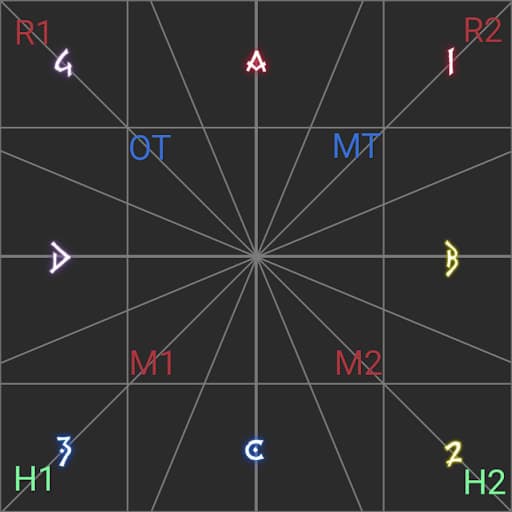
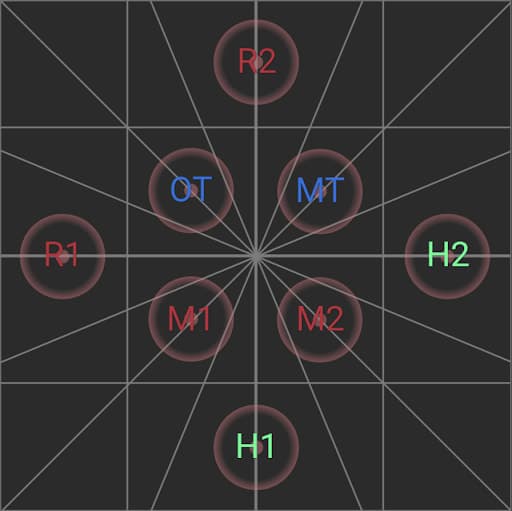
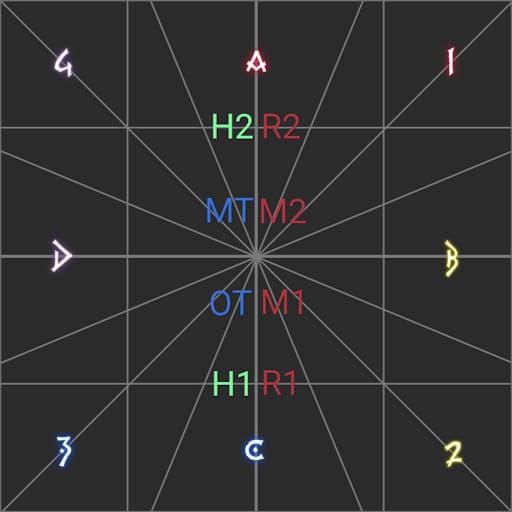
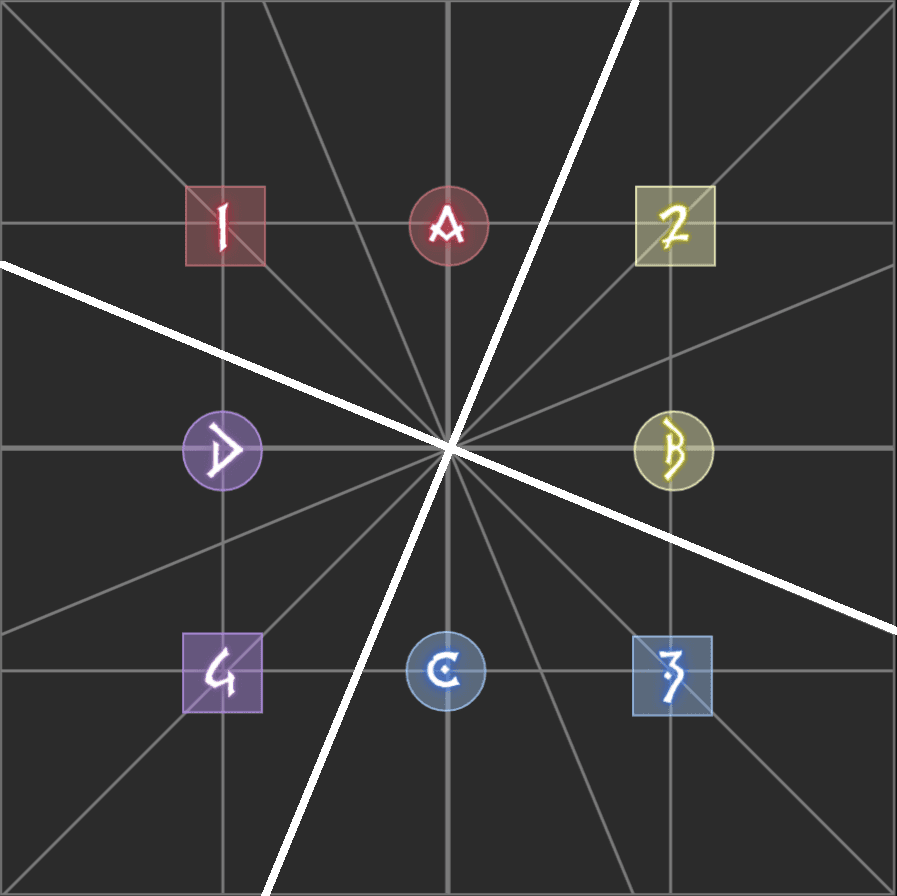
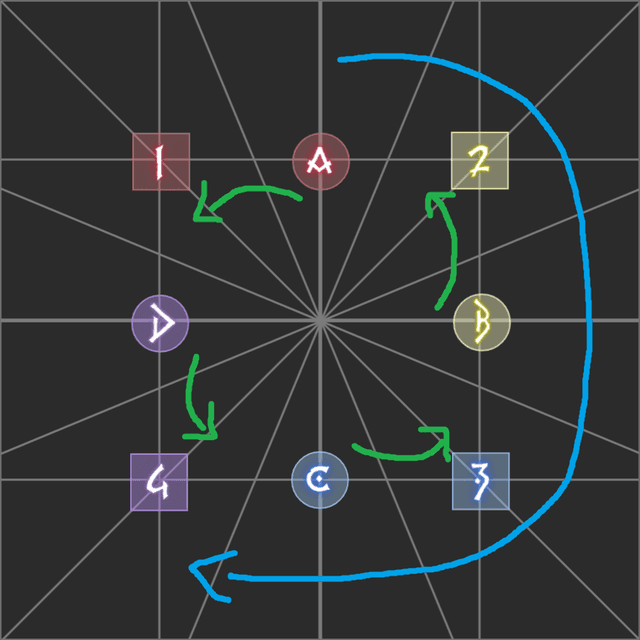
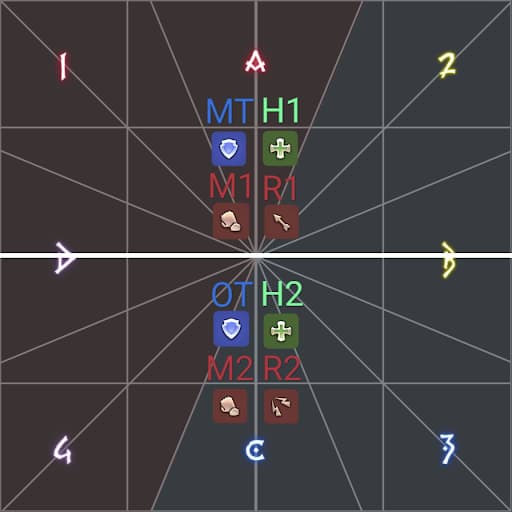
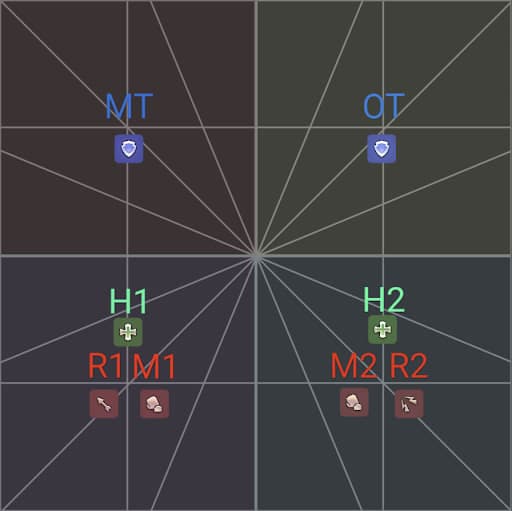
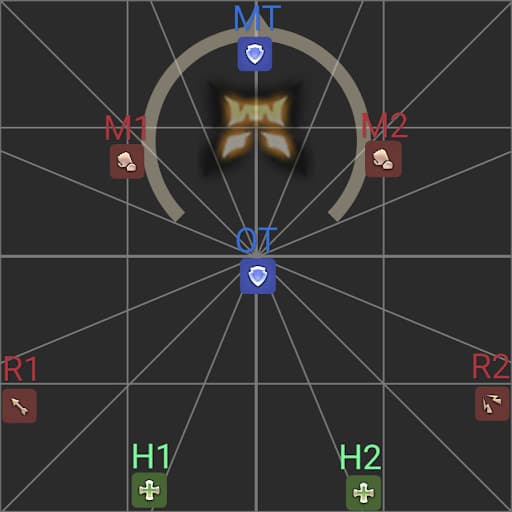
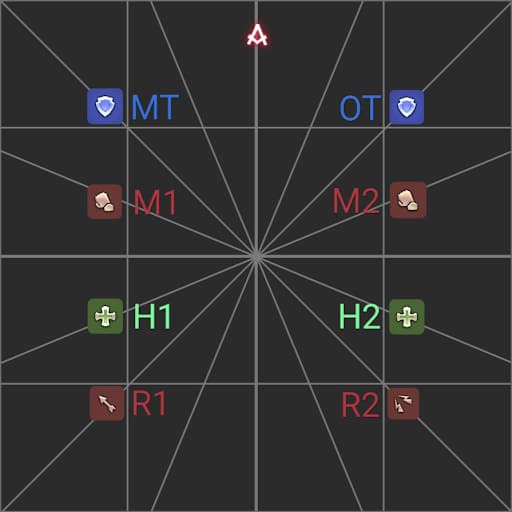
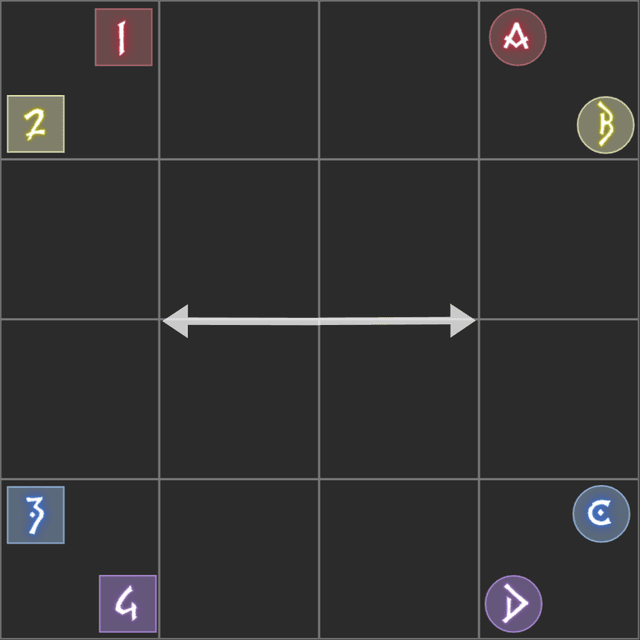
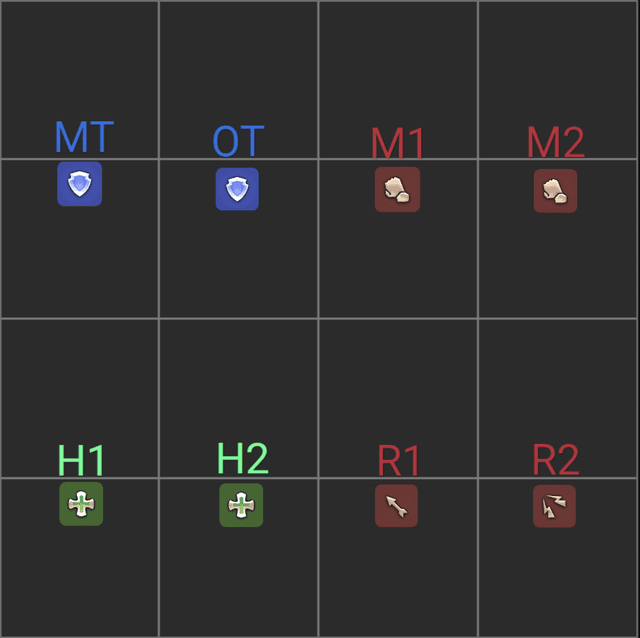
1 NE Marker System + TH CW
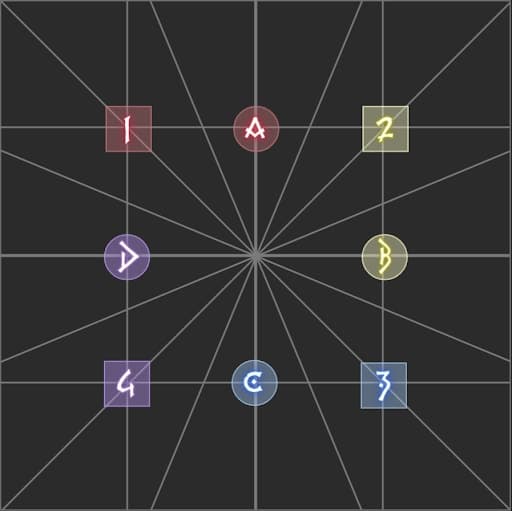
Baseline Clock Markers
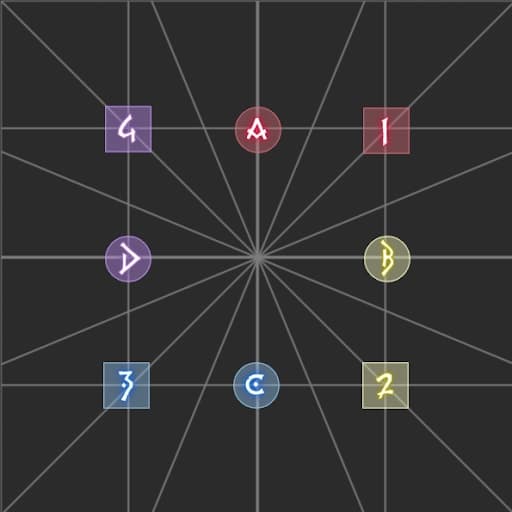
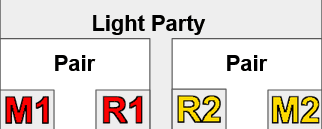
Light Parties and Pairs

Pairs will resolve in their quadrants
Light Parties will resolve in their halves
Baseline Clock Position & Pairs
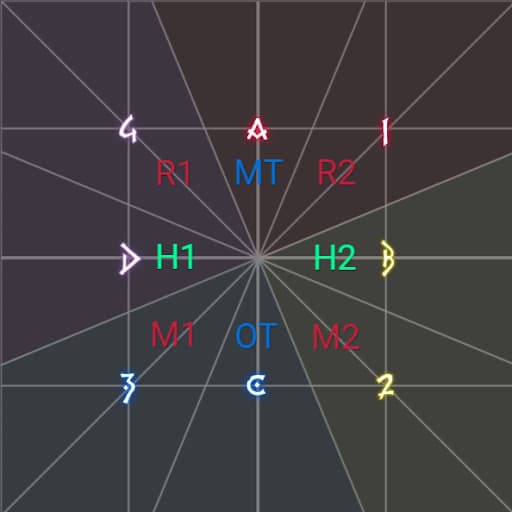
Supports & DPS should alternate as default
Tank & Healers (TH) rotate clockwise for coloured pairs
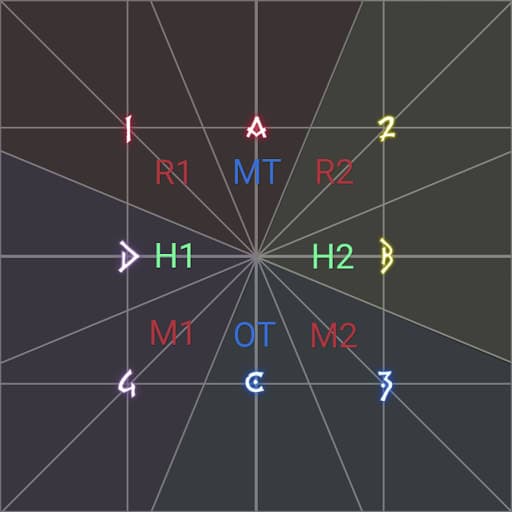
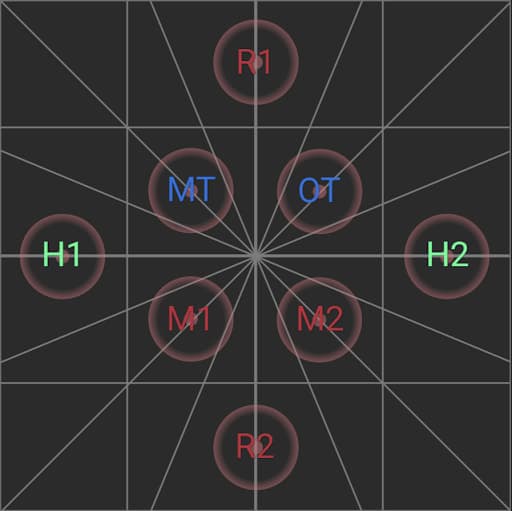
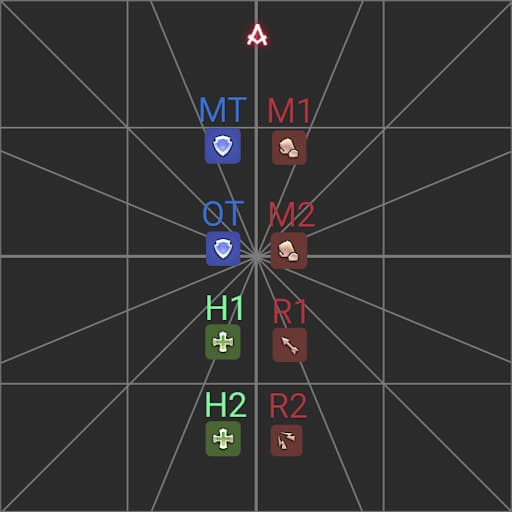
Baseline Light Party Split
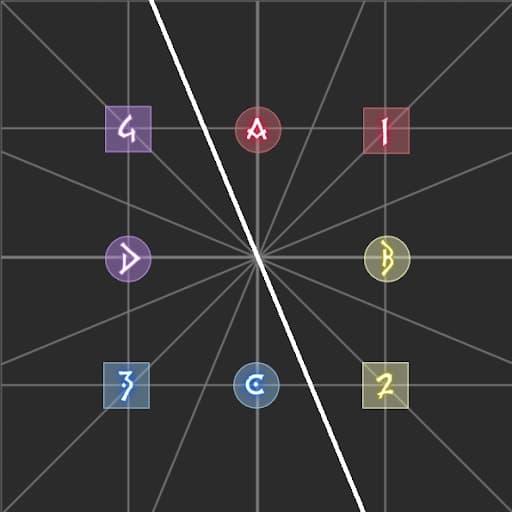
East-West split
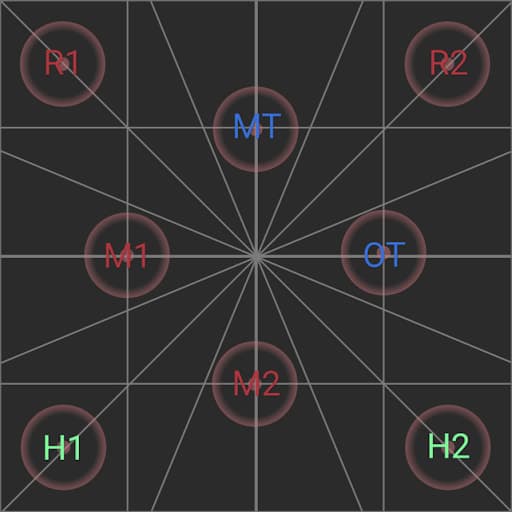
North-South split
The Preference for E/W LP Split over N/S Split
Fundamentally, this is the result of Light Parties (LP) being divided in an east-west fashion and not a north-south fashion. Take the northeast intercardinal as an example. The division has designated this intercardinal to the right group. Resolving mechanics as north-south, the left group would go to an intercard designated to the right group.
Certain mechanics may also have practical reasons to why east-west split is preferred. North-south splits are still viable in certain mechanics.
E.g.: P8S Fourfold Fires, Golbez Ex Void Stardust
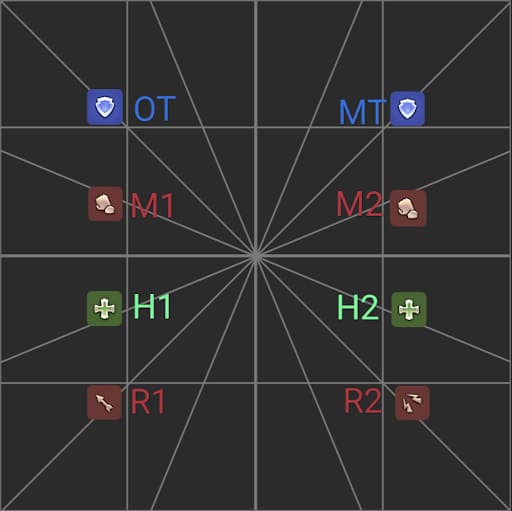
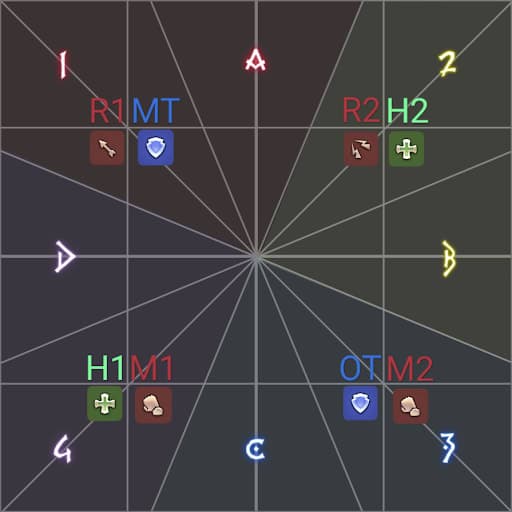
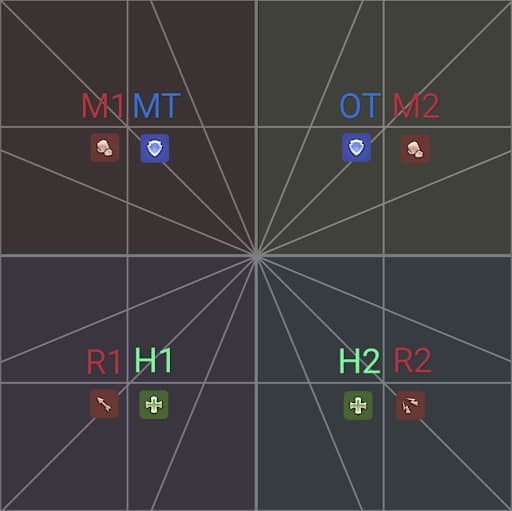
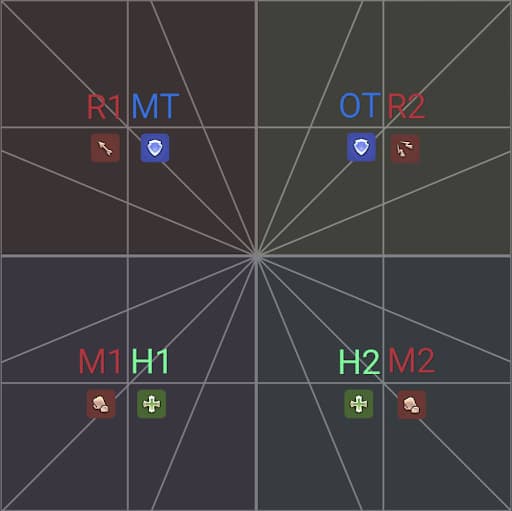
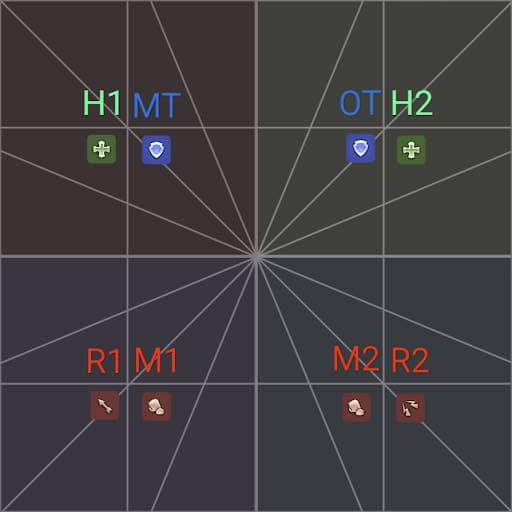
Positioning Permutations Stem from LP Splits
From the Light Party splits, we can derive additional pairings and positionings. Having consistent LP pairings improves overall consistency.
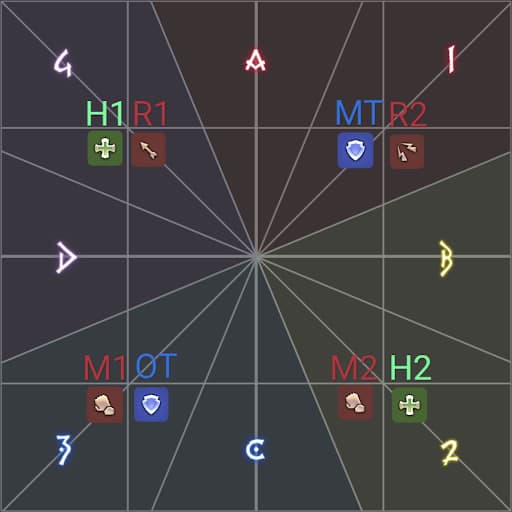
Default support + DPS pairs (coloured pairs)
Melee pairs and ranged pairs
Melee + ranged pairs
TH pairs and DPS pairs
3-person healer stacks
Note: pairs in the next slides do not need to be in a specific quadrant.
Derivative of Light Parties
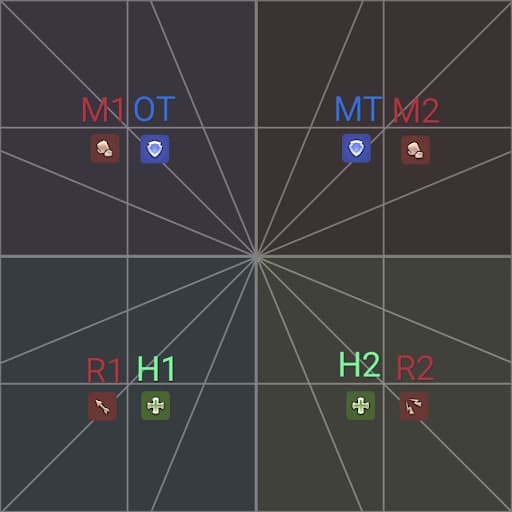
Melee pairs and ranged pairs
Melee + ranged pairs
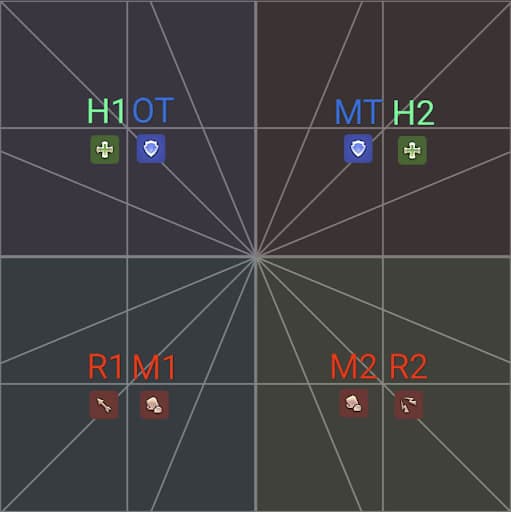
TH pairs and DPS pairs
3-person healer groups
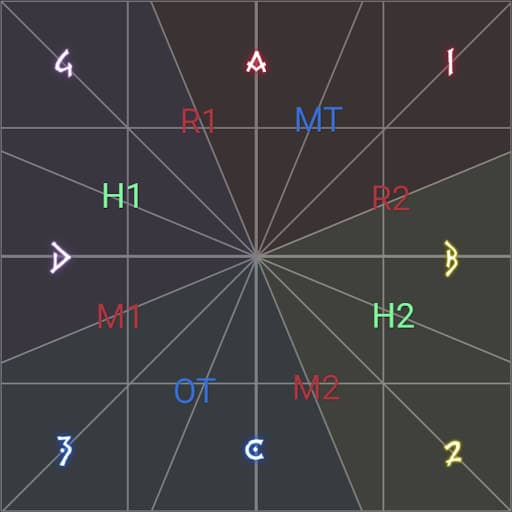
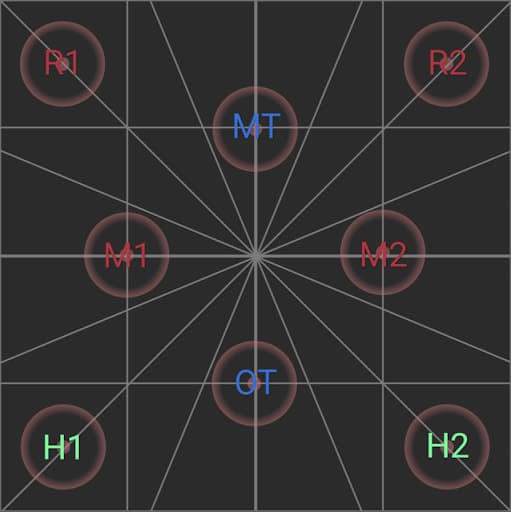
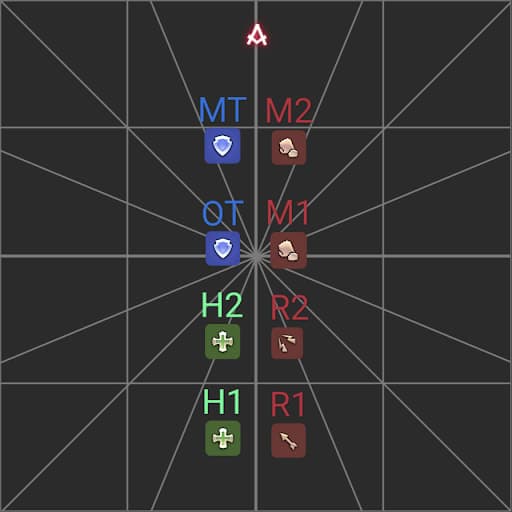
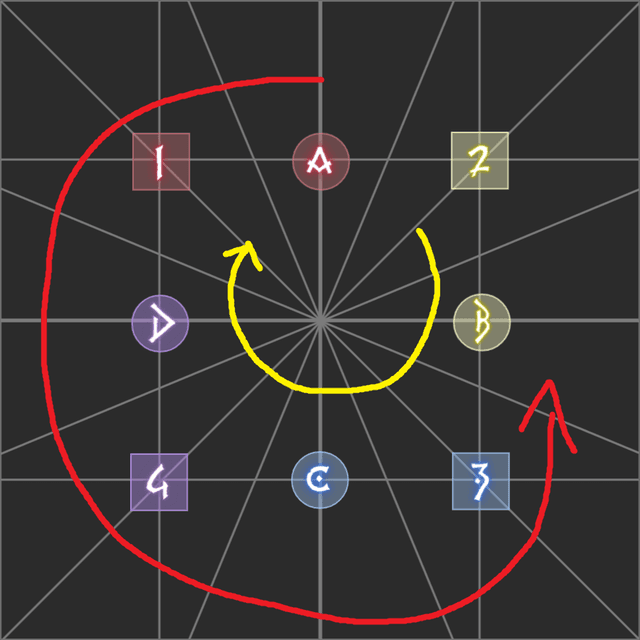
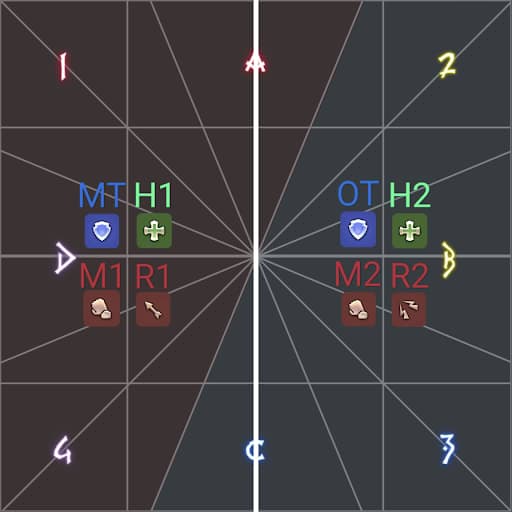
The “Group 2 North” Issue
Immediately, we can see the “inconsistency” with this system.
After rotating clockwise, the MT is on the right side and is in “group 2”. This could be unintuitive for many as they may be used to having MT in the left group. This also results in “group 2” being north and “group 1” being south, which may also be unintuitive especially when a line up occurs.
For this reason, many statics do not refer to LPs as “group 1” and “group 2”. Instead, they refer to them by TH or names. For example, “Nahira’s group”, “Tina’s group”, “MT group” or “OT group”. Players can also be referred to by their name or specific job rather than M1 or H2. Alternatively, LPs can be referred to as “left/right group” or “east/west group”. Furthermore, some statics label the east group as “group 1” and the west group as “group 2”.
“Group 2 North” Issue Example

E.g.: P3S Sparks of Condemnation, P8S Blazing Footballs
This lineup is sorted as “2-1 2-1” which some may find less intuitive than “1-2 1-2”. With the “D1-4” notation, rather than a typical “D1 D2 D3 D4” (1234) lineup, it is “D2 D1 D4 D3” (2143), which once again may be unintuitive.
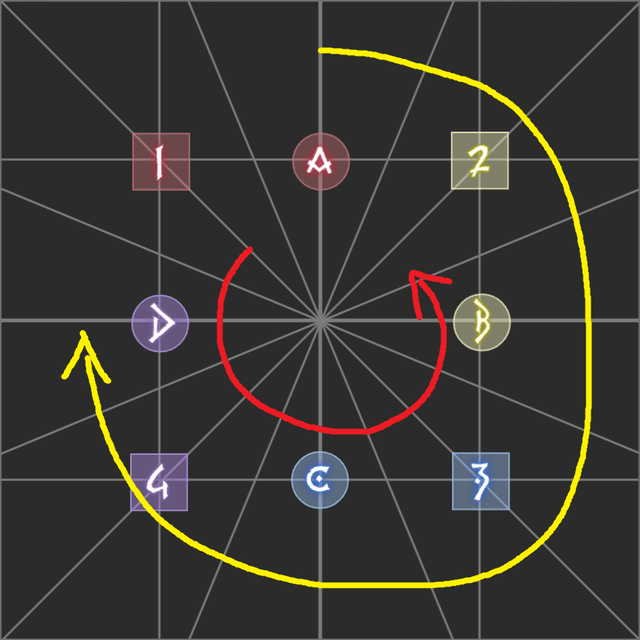
Off Tank to North Movement
In positions where the OT needs to be north, the movement would be towards the intercardinal of the ranged in the same group, which is NW in this system.
Similarly, there may be occasions when the ranged player (R1 in this system) needs to reposition themselves towards the South.
Many positions require the OT to be north and some are highlighted in this resource. Similarly albeit less often, the ranged may need to be south. PF pairings during DSR Meteors is an application example.
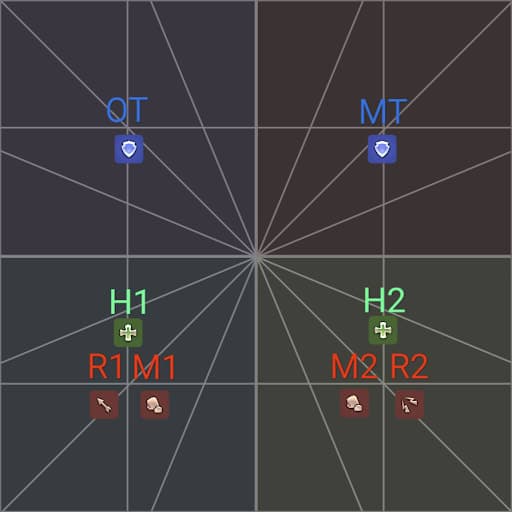
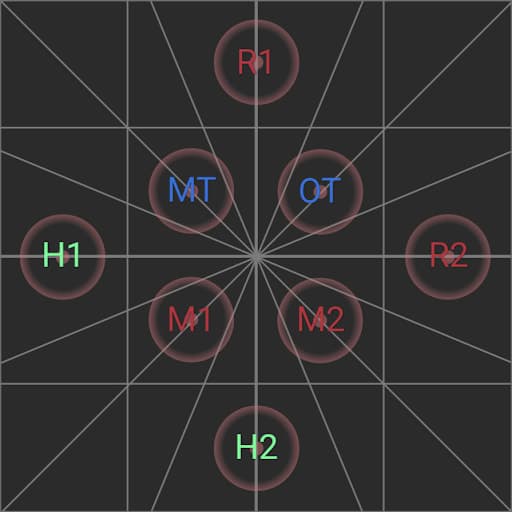
Healer South Clock Variation
This variation of clock position naturally pairs a melee with a ranged once TH rotate. However, this requires using a different clock position altogether, which in itself is a form of inconsistency.
This variation is most useful when the OT and their partnered ranged cannot arrive at their desired position in a sufficient amount of time.
After THs rotate, a Delta Attack position can be derived, which is an application of this variation. In addition, PF positionings of E9S Empty Planes can also be an application example.
Application: Octogonal Spread
E.g.: P8S Gorgomanteia 2, Alpha Omega Wave Cannon 2, O12S Synthetic Shield
Application: Delta Attack Spread
E.g.: E1S Delta Attack, P6S Dark Ashes, P8S Octaflare
Application: Uptime Stack/Spread

E.g.: E8S Uptime Scythe Mirro

E.g.: E12S Dark Eruption
Application: Near/Far Towers
E.g.: E2S towers
E.g.: O6S towers
Application: Near/Far Towers - Healer S Variation
E.g.: E2S towers
E.g.: O6S towers
Application: Quickmarch Lineup
Role-based lineup. E.g.: UCoB, E3S Drenching Pulse
LP-pairing-based lineup. E.g.: P3S Sparks of Condemnation, P8S Blazing Footballs
Application: Uptime Line Pairs
E.g.: O3S Panel Swap 3
E.g.: Golbez Ex Gale Sphere
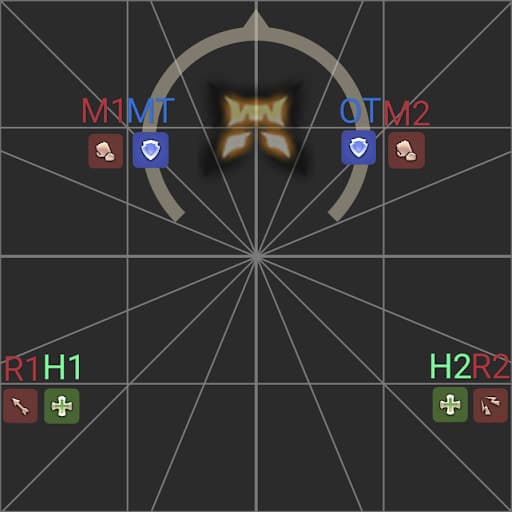
Tank Swaps and Positionings
Depending on the specific tank holding aggro, tanks could have dynamic grouping and positionings. One approach to this is to associate positioning based on aggro, regardless of the specific player.
Some mechs may allow tanks to be in their original grouping and pairings regardless of their aggro status. For example, certain mechs with E/W splits. Any decision on positioning deviations should be explicitly discussed.
While it is possible for specific tanks to position in different groups and pairs, it is still important to have a systematic approach to where MT and OT should be. Simultaneously, if one tank can MT most or all of a fight with no substantial introduced complexity, they likely should do so to reduce positioning complexity.
“MT” is aggro specific, while “T1” is player specific
Conclusion
With the system of solving from clock to pairs to light party, most mechanics can be solved within the same 4 players in the LP. For example:
Tank > Melee
Tank > Ranged
Tank > Healer
It should become the priority to know where the players in your light party are and what mechanics they need to resolve. Otherwise, other players such as those within your role should be minded.
Tank > Tank
With the trend of more streamlined fight design in Savage, clock positions can be used to account for the vast majority of positionings in Savage strats. By having a more in-depth split (1 role in each light party), there will be more permutations for splits we can do for positionings.
The main takeaway is concept for deriving pairings and positions from clock based on a set of guidelines. All other positions are derivatives of splits that are possible from the initial clock position. This is true regardless of clock setup or the specific principles followed.
With the importance of pairings outlined, the marker system should be decided with pairing system in mind to create coloured pairs.
Due to the nature of PF, positioning systems used in PF strats are highly discrete and often lack consistency within itself. For example, P8S and P11S may use different systems with regards to how players rotate and how LPs are determined. In addition, certain inherent PF preferences outlined in other slides also indicate a likelihood of inconsistency in PF systems.
The same should not be said about statics, especially long term ones. Statics should have a congruent system across different raids and tiers to improve their consistency and execution.
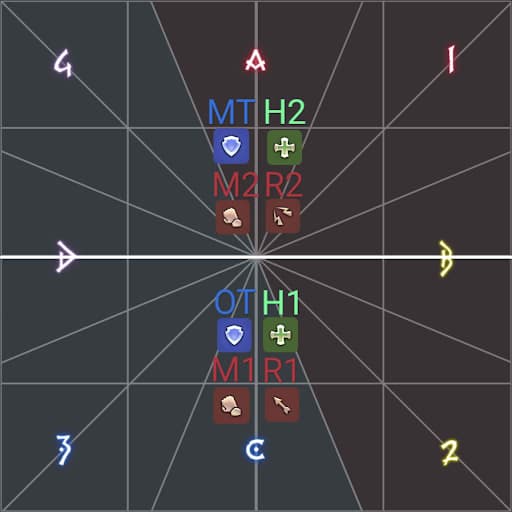
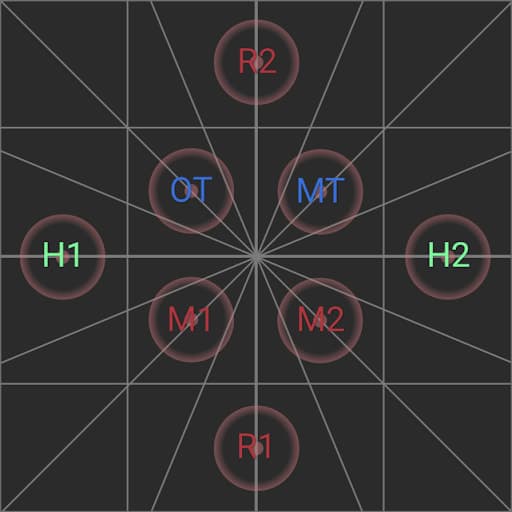
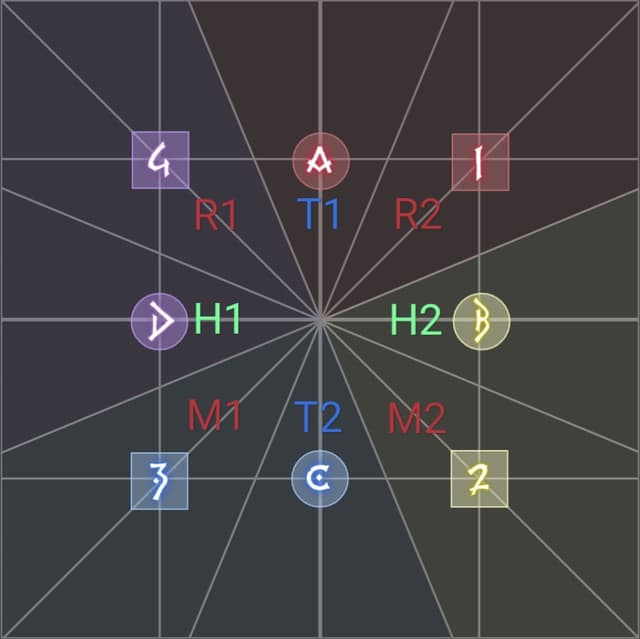
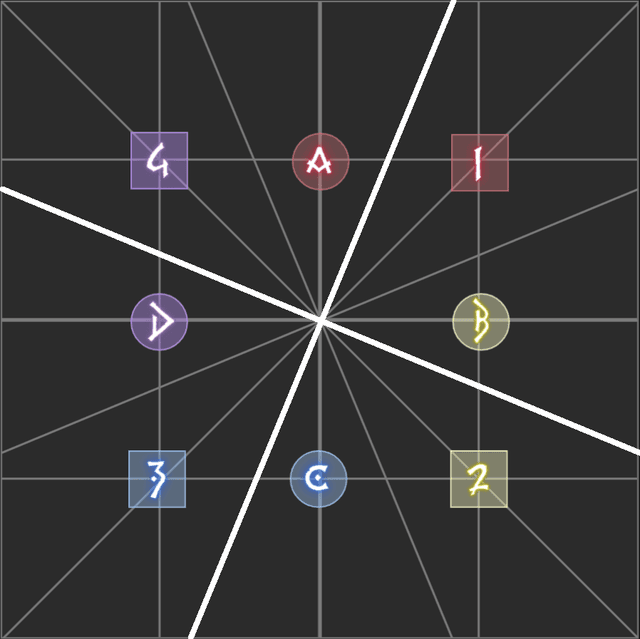
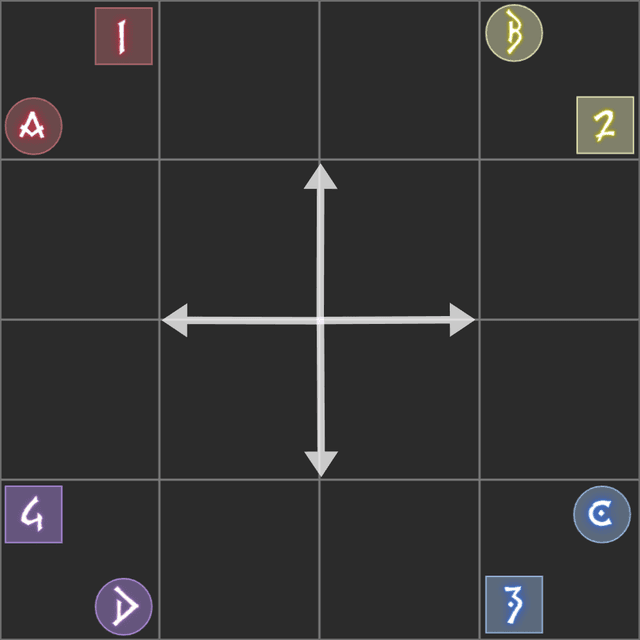
1 NW Marker System + TH CCW
Pairings and Group Splits Should Match Markers
Pairs will resolve in their quadrants

Light Parties will resolve in their halves
Inconsistency of PF System
PF often choses having TH rotate CCW and designate MT in the left group, but retains the 1 NE marker system. As a consequence, marker colours no longer match pairings and lose value in some intuitiveness that could have been provided.
Issue of Rotational Positioning
With MT and the north cardinal assigned to the left group, any positioning derived from a rotation should have the left group rotate CCW from north, while the right group would rotate CW from northeast. However, north CCW could be unintuitive to some as they may find north CW to make more sense.
Alternatively, the system of left group rotating CCW from northwest can be used, while the right group rotates CW from north. However, in the case of north-south, this creates a situation where groups would arrive at the cardinal associated with the opposite group.
Inconsistency in Rotational Positioning for TH & DPS
The norm for determining rotational positioning for roles is TH rotate clockwise from north, and DPS rotate counterclockwise from northwest. This rotation is opposite from how default support and DPS pairings are determined, where TH pair with their partners by rotating counterclockwise, and DPS by rotating clockwise.
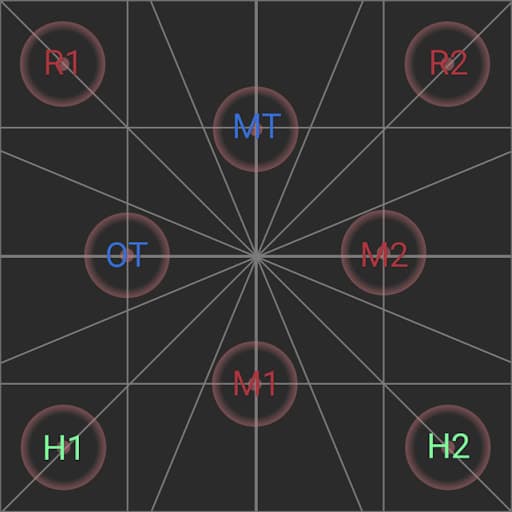
Baseline Clock Positions & Pairs
Tank & Healers rotate counterclockwise
Baseline Light Party Split
East West split
North South split
Derivative of Light Parties
Melee pairs and ranged pairs
Melee + ranged pairs
TH pairs and DPS pairs
3-person Healer groups
Healer South Clock Variation
Application
Octogonal Spread

Delta Attack spread
Application: Uptime Stack/Spread
Application: Near/Far Towers

Application: Near/Far Towers - Healer S Variation
Application: Quickmarch Lineup
Role-based lineup
LP-pairing-based lineup
Application: Uptime Line Pairs
Supplemental Concepts

Determining Orientation is of Critical Significance
Positioning solutions cannot be properly executed without an orientation. Such orientations should be logical and consistent within a mechanic if possible. Orientations include:
True north
Boss relative
Wall relative
Mechanic relative
Direction relative
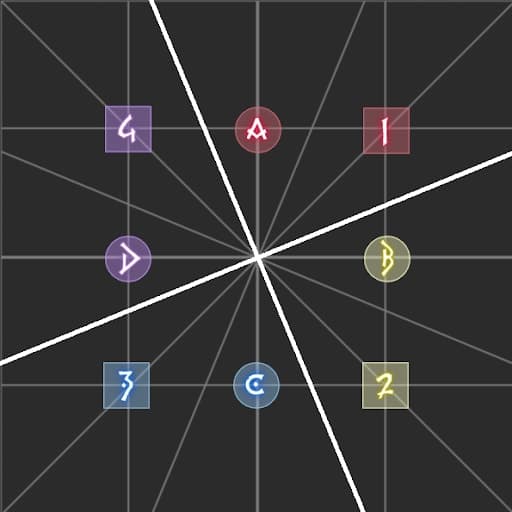
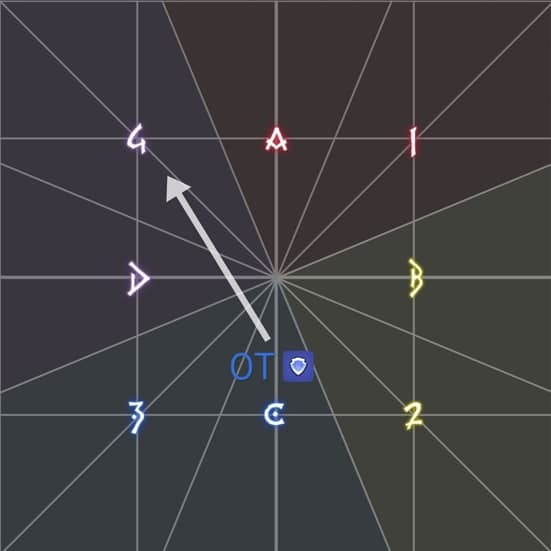
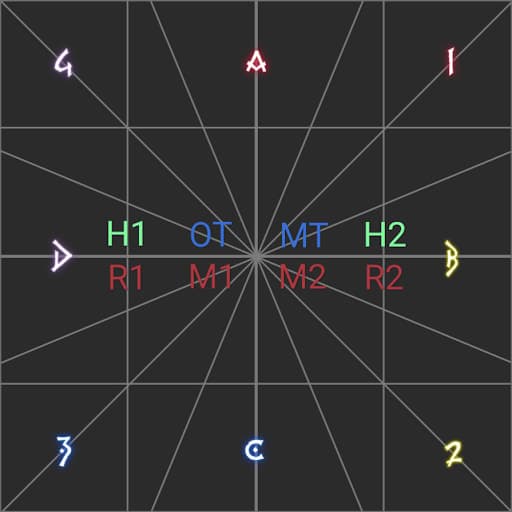
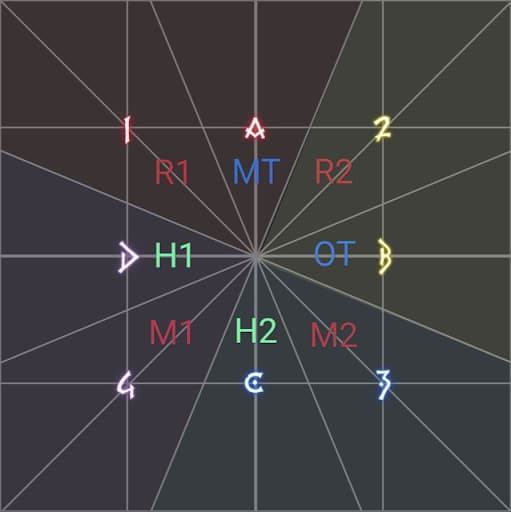
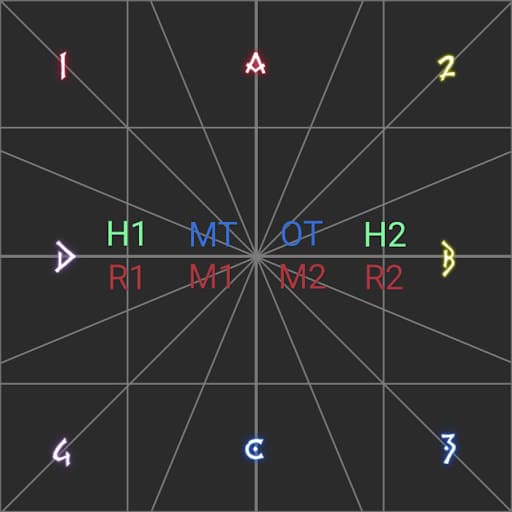
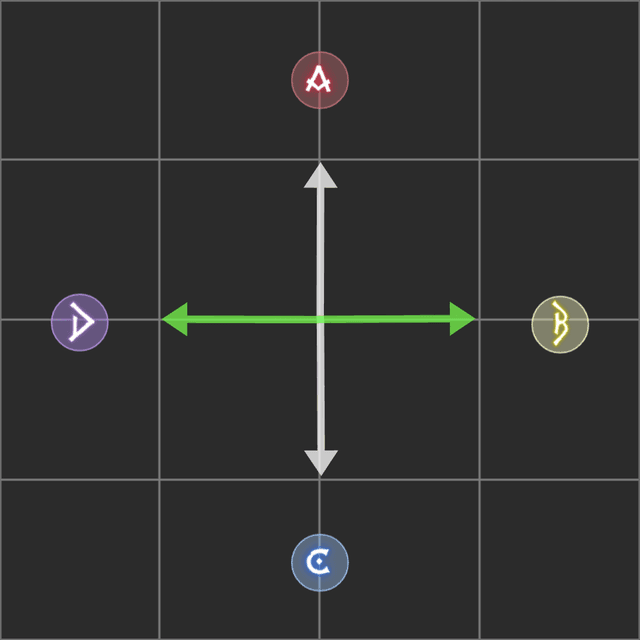
Understanding Left/Right vs. Rotational Positioning
Left/right positioning is applicable when positioning possibilities are constrained a binary fashion. This concept also applies to directional choices with only two possibilities.
This concept is also applicable to E/W positioning and N/S positioning.
In the diagram, suppose a mechanic requires a positioning that can be on a number and/or a letter. The resulted split is in a binary fashion.
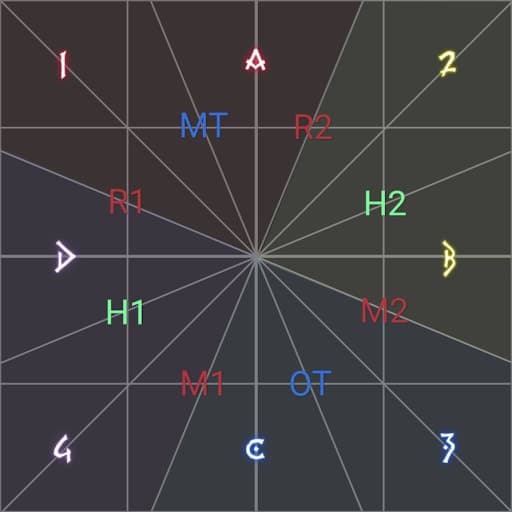
Rotational positioning refers to positioning solutions by rotating in a CW or CCW manner until positioning is determined.
This method is suitable when positioning possibilities exist in a multifaceted manner.
In the diagram, suppose a mechanic requires a positioning that can be on different coloured markers. Additional directions have been introduced compared to the previous example.
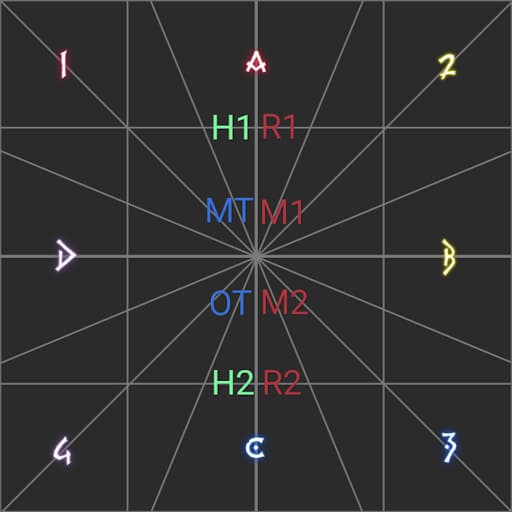
Certain mechanics with rotational positioning solutions can still be resolved in a binary manner with an additional axis introduced if necessary.
In the diagram, suppose a mechanic requires a positioning that can be on any two markers. The solution can be done as left/right with the exception of the N/S, in which case options are still limited to two to be solved.
Shifting vs. Mirroring
Shifting and mirroring are two methods of altering positionings. Shifting refers to the translation of positions along an axis, whereas mirroring refers to the reflection of positions.
“Staying” and “going far” relative to a mechanic is a form of mirroring.
E.g.: P8S Natural Alignment
Role-based Directional Positioning
Rules for directioning of different roles can be predetermined. As roles are categorized by THMR, it makes intuitive sense for TH to be on the left or west side. Examples:
TH left, DPS right
TH north, DPS south
Melees left, ranged right
TH north CW, DPS northwest CCW
TH near middle, DPS far from middle
E.g.: Role-based spread
Acknowledgements
Written by Reina Leigh of Leviathan. If you have any questions or comments, feel free to contact me on Discord @reinaleigh.
Special thanks to…
Akaya Drouth of team DN for the original draft and inspiring me to create this resource
Lial Varia of team DN for being a great friend and supporting all my theorycrafts
Loleon for the discussion on these fundamentals that changed some of my thoughts
Balance mentor team for their feedback and suggestions
You can view the original powerpoint here